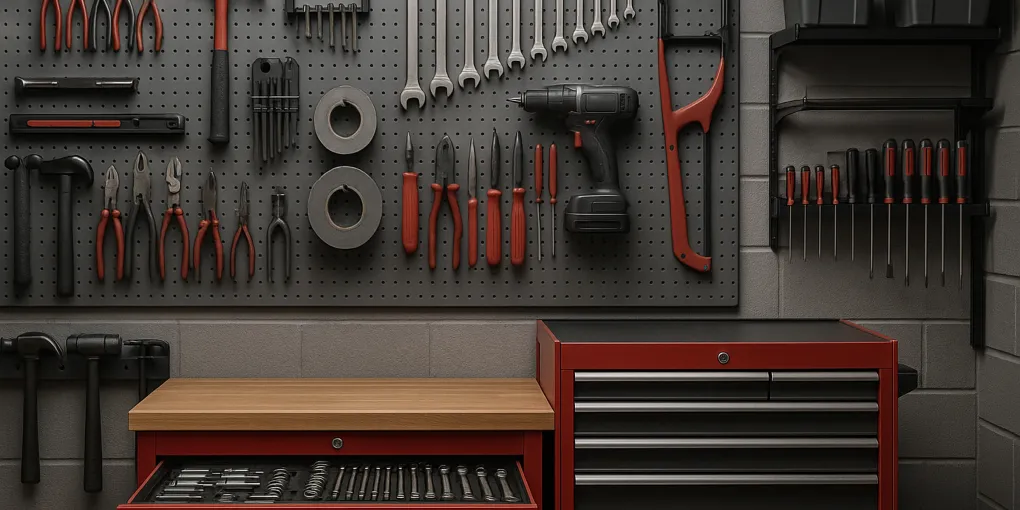
How to Organize Tools in a Garage 2026
Buyer's GuideQuick picks
FLEXIMOUNTS Wall-Mounted Pegboard with Accessories Kit
Craftsman 2000 Series 5-Drawer Rolling Tool Chest
Akro-Mils 44-Bin Hardware and Craft Organizer Cabinet
Why Tool Organization Is a Safety and Efficiency Investment
Quick picks
These are the products referenced in the guide; check dimensions, material, and installation limits before ordering.
-
- FLEXIMOUNTS Wall-Mounted Pegboard with Accessories Kit: Check current options on Amazon
-
- Craftsman 2000 Series 5-Drawer Rolling Tool Chest: Check current options on Amazon
-
- Akro-Mils 44-Bin Hardware and Craft Organizer Cabinet: Check current options on Amazon A disorganized garage tool collection isn’t just aesthetically unpleasant — it’s a genuine productivity and safety liability. When tools aren’t in designated locations, projects take longer (because finding the right tool takes time away from using it), tool maintenance gets deferred (because inspecting a tool requires finding it first), and injury risk increases (because tools stored randomly are more likely to be grabbed incorrectly, fallen on, or used when a different tool would be safer for the task).
Behavioral research on expert craftspeople consistently identifies environmental organization as a key predictor of workshop safety and productivity. A study of professional woodworkers found that those with organized tool storage made significantly fewer mid-task workflow interruptions than those in disorganized shops — and that workflow interruptions were associated with both lower quality work and elevated minor injury rates. The organizational environment of a workshop shapes the cognitive and physical experience of working in it.
For home DIY enthusiasts, the translation is straightforward: a tool organization system that puts every tool in a predictable location, makes missing tools immediately visible, and allows a project to proceed from start to finish without tool-hunting interruptions is worth the upfront investment in time and storage hardware.
The three-tier organizational model used in professional workshops — immediate access storage (pegboard and top drawer), task-based access storage (tool chest drawers, wall shelves), and archive storage (high shelves, bins) — maps directly onto the home garage context and provides the structural framework for everything in this guide.
For broader garage organization strategies beyond tools, see our guide on how to organize a garage by zone. For shelving units that support tool storage, see best garage shelving units.
Step 1: Conduct a Full Tool Audit and Categorize Your Collection
Before purchasing storage systems, you need an accurate inventory of your tools organized by category. Most homeowners discover during a tool audit that their collection is larger, more diverse, and more in need of curation than they realized.
Gather all tools from every storage location: garage shelves, the back of vehicles, kitchen junk drawers, basement storage, outdoor sheds. The complete picture is essential.
Sort by category:
- Hand tools — cutting: Saws (hand saw, coping saw, utility knife), chisels, files, rasps
- Hand tools — striking: Hammers (claw, rubber mallet, ball peen), mallets
- Hand tools — gripping and turning: Screwdrivers (organized by type and size), pliers (needle-nose, channel-lock, lineman’s), wrenches, nut drivers
- Hand tools — measuring and layout: Tape measures, levels (multiple sizes), squares, marking gauges, chalk lines
- Sockets and drives: Socket sets organized by drive size (1/4”, 3/8”, 1/2”), extensions, ratchets, torque wrenches
- Power tools: Drills, saws (circular, jigsaw, reciprocating), sanders, rotary tools
- Fasteners and hardware: Screws, nails, bolts, nuts, washers — the small-parts organization challenge
- Finishing tools: Paintbrushes, rollers, scrapers, putty knives
- Plumbing and electrical specialty tools
- Safety equipment: Safety glasses, hearing protection, dust masks, gloves
Assess each tool’s condition:
- Functional and well-maintained: Keep, assign storage
- Functional but needs maintenance: Keep, schedule maintenance before storing
- Non-functional or damaged: Repair or discard
- Duplicate: Evaluate whether the duplicate is genuinely useful or space-consuming
Count what remains by category to determine storage volume requirements. This count drives the sizing decisions for every storage product you’ll purchase.
Step 2: Choose Your Primary Tool Storage Architecture
The “architecture” of a garage workshop refers to the combination of storage systems that together hold the entire tool collection. Most functional home garage workshops use three to four storage systems in combination.
The pegboard wall system (for hand tools):
A pegboard mounted to a clear wall section is the most efficient hand tool storage system available. Tools hang on hooks, each in a fixed location, fully visible from across the workshop. The single-glance accessibility of a pegboard means you can see in seconds whether a tool is in place or in use — an inventory benefit that enclosed storage can’t match.
Standard 1/4-inch pegboard is sufficient for most hand tools; 1/8-inch pegboard is lighter but less durable. Mount pegboard on spacers (1.5–2 inches from the wall) to allow hooks to catch properly. Avoid mounting pegboard directly against the wall. A 4×8 sheet (32 square feet) is a common starting size; many workshops use two sheets side by side.
Paint the pegboard before mounting and consider tracing each tool’s outline with a marker or paint after hanging — this “tool silhouette” system makes it immediately obvious when a specific tool is missing.
The tool chest (for organized hand tool and socket storage):
A rolling tool chest with multiple drawers is the most secure, organized, and dust-protected hand tool storage option. Drawers keep tools sorted and protected; the rolling base allows repositioning the tool chest to any worksite in the garage. Most serious home mechanics and DIYers use a tool chest as the anchor of their storage system.
Organize tool chest drawers by category — one drawer for screwdrivers, one for pliers and wrenches, one for sockets and drives — with foam liner cut-to-fit inserts that create custom-shaped depressions for each tool. Foam inserts provide the most precise tool organization available and make missing tools immediately visible.
Garage wall shelving (for power tools and large equipment):
Heavy-duty wall shelving holds power tools, paint cans, caulk guns, and other large items that don’t fit on a pegboard or in a tool chest. Organize power tools on shelves by category; store them in their original cases or in dedicated holders when possible.
Small parts storage (for fasteners and hardware):
A dedicated small-parts storage system — typically a parts cabinet with multiple small drawers or a set of stackable bins — is essential for organizing screws, nails, bolts, nuts, and other hardware. The organizational investment in hardware labeling pays large dividends in project efficiency: finding the right fastener takes 5 seconds with a labeled system and 5 minutes without one.
Step 3: Install and Set Up the Pegboard System
The pegboard installation is the highest-impact single step in a garage tool organization project. A well-executed pegboard makes hand tool accessibility immediately obvious and transforms the daily experience of working in the garage.
Installation steps:
-
Choose your pegboard wall section: ideally above a workbench or the primary tool chest, at standing eye level down to waist height. Clear the area.
-
Locate wall studs. Pegboard mounted only to drywall without stud anchoring will pull out under tool weight. Mark studs with tape.
-
Cut spacers from 1×2 lumber (or use manufactured pegboard spacers). These spacers create the gap between the pegboard and wall that allows hook insertion.
-
Mount the spacers to studs. Mount the pegboard to the spacers. Use 1/4-20 carriage bolts or appropriately-rated wood screws.
-
Install initial hooks in a logical arrangement — heavier tools lower, lighter tools higher. Group related tools: all screwdrivers together, all hammers together.
-
Hang tools and trace outlines with a Sharpie or paint marker.
The silhouette system:
After hanging all tools in their designated positions, use a contrasting-color marker or paint to trace the outline of each tool on the pegboard behind it. Now the pegboard shows both where each tool belongs (labeled) and where each tool currently is (its outline is empty if the tool is in use). This is the professional workshop standard for tool accountability.
Step 4: Organize the Tool Chest
A tool chest provides the most organized storage available for the hand tools that benefit from protection from dust and damage. The key to tool chest organization is using drawer inserts to assign each tool a specific location and using drawer-by-category organization to create logical retrieval patterns.
Drawer assignment principles:
Top drawers (most accessible) hold the most frequently used tools: primary screwdrivers, primary wrenches, primary pliers. Middle drawers hold moderate-frequency tools and larger tool categories. Bottom drawers hold heavy, infrequently-used, or seasonal tools.
Within each drawer, a foam liner cut to match each tool’s profile creates maximum organization. Kaizen foam (eva foam sold in sheets specifically for tool organization) allows you to cut custom profiles with a utility knife or laser cutter. Label each foam cutout with the tool name in permanent marker so that even if a tool is replaced or borrowed, the storage location remains clear.
Socket organization:
Sockets deserve special attention because they’re small, come in large sets, and are easy to disorganize. Use socket rail organizers (spring-loaded pegs sized to each socket) mounted to the drawer’s foam liner, or dedicated socket organizer trays. Organize rails by drive size (1/4”, 3/8”, 1/2”) and by socket type (standard, deep, metric, SAE). Label the drawer “SOCKETS” with drive sizes listed.
Step 5: Set Up Small Parts Storage and Label Everything
Small parts storage — for screws, nails, bolts, nuts, anchors, washers, and the dozens of other fastener and hardware types a home workshop accumulates — is often the most overlooked component of garage organization and the one that causes the most project delays.
Parts cabinet organization:
A multi-drawer parts cabinet (15–40 small drawers) or a set of stackable bin organizers provides the necessary granularity for hardware storage. Each drawer or bin corresponds to one hardware type and size: “3/4” wood screws — coarse thread,” “1/4-20 hex bolts,” “spring toggle anchors,” etc.
Label every drawer or bin from the outside. Clear-front drawers or clear-sided bins eliminate the need to open each one to find the right hardware. Group related hardware categories together: wood fasteners in one section, metal fasteners in another, anchors in a third.
Power tool cord and accessory organization:
Power tool accessories (drill bits, saw blades, sander sheets) need dedicated storage adjacent to their corresponding power tool. A small labeled bin or drawer for drill bits near the drill, a labeled bin for saw blades near the saws. This co-location principle prevents the common failure mode of accessories migrating away from the tools they belong with.
For a comprehensive look at all garage storage solutions, see our guide to best garage storage solutions.
Garage tool storage buying criteria
Use these factors to compare options before ordering:
| Factor | Weight | What to check |
|---|---|---|
| Research | 30% | Depth of specification and user-report analysis and breadth of products reviewed |
| Evidence Quality | 25% | Reliability of specs, product documentation, and repeated owner-reported fit patterns |
| Value | 20% | Cost-effectiveness relative to competing products at similar quality tiers |
| User Signals | 15% | Long-term owner feedback and fit-related complaints |
| Transparency | 10% | Accuracy of manufacturer claims, material disclosures, and dimension accuracy |
Scores are differentiated — top picks typically score 8.5–9.5, mid-tier 7.0–8.4, and weak options below 7.0.
Product Recommendations
1. FLEXIMOUNTS Wall-Mounted Pegboard with Accessories Kit
Check current options for FLEXIMOUNTS Wall-Mounted Pegboard with Accessories Kit
This heavy-duty steel pegboard panel (not the inferior hardboard variety) comes in a kit with over 50 hooks and accessories — pegs, bins, shelves, and a tool holder rail. The steel construction handles significantly heavier tools than hardboard pegboard and doesn’t bow or flex under load. The included accessory variety allows immediate installation of a functional hand tool display. Surface finish resists rust in typical garage humidity conditions. Available in multiple size configurations.
| Criterion | Weight | Score |
|---|---|---|
| Capacity & Dimensions | 30% | 9.0/10 |
| Material Quality | 25% | 9.5/10 |
| Ease of Assembly & Use | 20% | 8.0/10 |
| Long-Term Value | 25% | 9.2/10 |
| Composite Score | 9.0/10 |
2. Craftsman 2000 Series 5-Drawer Rolling Tool Chest
Check current options for Craftsman 2000 Series 5-Drawer Rolling Tool Chest
The Craftsman 2000 Series is the gold standard of consumer-grade rolling tool chests for home garage use. Five drawers with full-extension, ball-bearing drawer slides provide smooth access even under heavy loads. The 100-pound-per-drawer weight rating accommodates even large socket and wrench collections. The powder-coat finish resists rust and chemical splash common in garage environments. The keyed lock secures the entire chest when unattended. Pairs with matching tool cabinet toppers for expanded storage.
| Criterion | Weight | Score |
|---|---|---|
| Capacity & Dimensions | 30% | 9.2/10 |
| Material Quality | 25% | 8.8/10 |
| Ease of Assembly & Use | 20% | 8.5/10 |
| Long-Term Value | 25% | 9.0/10 |
| Composite Score | 9.0/10 |
3. Akro-Mils 44-Bin Hardware and Craft Organizer Cabinet
Check current options for Akro-Mils 44-Bin Hardware and Craft Organizer Cabinet
This 44-drawer small parts cabinet is the definitive solution for garage hardware organization. Each clear-front drawer is removable, visible from the front, and labeled on an integrated label holder. The drawers range in two sizes — 12 larger drawers for bulk hardware, 32 smaller drawers for small fasteners and specialty hardware. The cabinet mounts to a wall or stands on a workbench. At modest cost per drawer, it’s one of the best per-dollar organizational investments available for a home workshop.
| Criterion | Weight | Score |
|---|---|---|
| Capacity & Dimensions | 30% | 8.5/10 |
| Material Quality | 25% | 8.3/10 |
| Ease of Assembly & Use | 20% | 9.0/10 |
| Long-Term Value | 25% | 9.3/10 |
| Composite Score | 8.7/10 |
Maintenance: Keeping the Workshop Organized
A well-organized workshop can degrade within a single project if cleanup habits aren’t established as firmly as the organizational system itself. The best tool organization systems build cleanup into the workflow rather than treating it as a separate, deferred task.
The “immediate return” rule:
The single most effective workshop maintenance habit is returning every tool to its designated storage location immediately after each use — not at the end of the project, not at the end of the day, but immediately after putting it down. This habit prevents the accumulation of “tools I’ll put away later” that characterizes disorganized workshops.
Post-project reset:
After completing any project, before leaving the workshop, spend 5–10 minutes doing a complete tool return: every tool back on the pegboard or in the correct drawer, every piece of hardware back in its labeled bin. The pegboard’s silhouette system makes a visual check immediate: any empty silhouette indicates a tool that hasn’t been returned.
Monthly maintenance (20 minutes):
- Check all tool chest drawers for organization drift
- Verify that all pegboard hooks and tools are secure
- Assess fastener and hardware inventory; restock depleted categories
- Wipe down tool surfaces and check for rust on any bare metal tools
Annual maintenance (1–2 hours):
- Conduct a tool condition audit: test every power tool, inspect every hand tool for wear or damage
- Apply rust inhibitor to bare metal surfaces as needed
- Reorganize any drawers or pegboard sections that have drifted from their original design
- Evaluate whether the organization system still matches your current tool collection — add a parts cabinet section if the hardware collection has grown, add pegboard if new hand tools have been acquired
A well-maintained garage tool organization system saves significant time on every project, makes tool maintenance practical, and transforms the garage workshop from a source of frustration into one of the most functional spaces in the home.
Frequently Asked Questions
- The most functional tool organization systems use both principles in hierarchy: primary organization by frequency of use (most-used tools in the most accessible locations), with secondary organization by type within each accessibility tier. Tools used multiple times per week should be at immediate arm's reach — typically on a pegboard or in the top drawer of a tool chest. Tools used monthly should be accessible but can tolerate a bit more retrieval effort. Tools used seasonally or rarely can be in higher shelves, deeper storage, or labeled bins.
- A standard 4×8 foot pegboard sheet can accommodate the hand tools of a moderately equipped home workshop — approximately 30–40 individual tool positions, depending on tool size. Most homeowners find 8–16 square feet of pegboard (one to two sheets) sufficient for their hand tool collection. Power tools and large equipment require shelf or bench storage beyond what a pegboard accommodates.
- Socket sets are best organized on socket rail organizers — bars with spring-loaded pegs sized to specific socket drive sizes (1/4-inch, 3/8-inch, 1/2-inch). Rails keep sockets sorted by size, prevent mixing of drive sizes, and make it immediately obvious when a socket is missing from the set. Socket rails can be mounted to a pegboard, stored in a tool chest drawer with a foam liner, or hung in a labeled pouch.
- Metal tools stored in a garage are vulnerable to rust and corrosion from humidity fluctuations, particularly in climates with significant seasonal changes. Mitigation strategies include: storing tools in a closed tool chest (which maintains lower internal humidity than open storage), applying a thin coat of camellia oil or similar rust inhibitor to bare metal tool surfaces annually, using silica gel packets in enclosed storage areas, and ensuring the garage has adequate ventilation to prevent moisture accumulation.