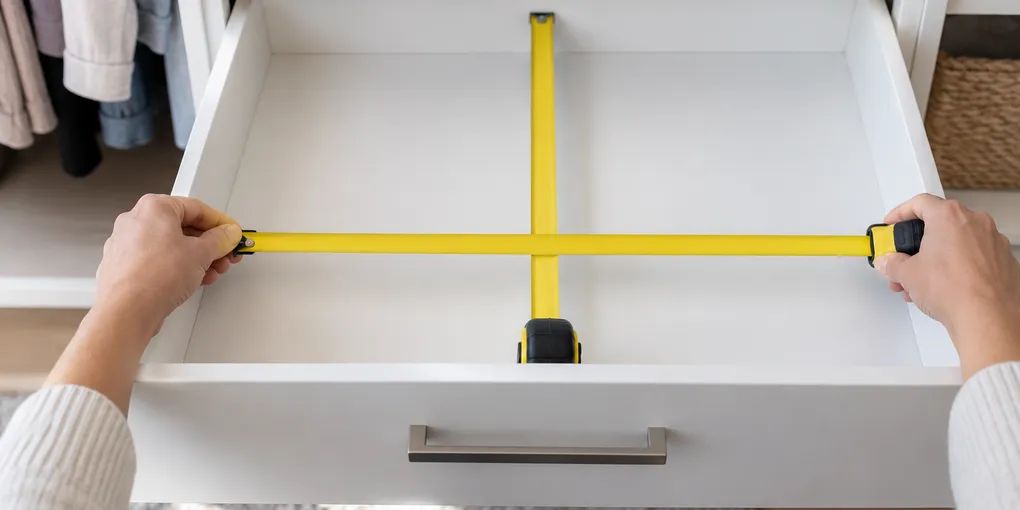
The organizer that looked right on a product page can still jam against a drawer wall or leave a dead strip behind it. Start with the drawer, not the organizer: measure the narrowest inside width, the usable depth, and the lowest clearance while the drawer is fully open. Then mark anything that takes away from that space, such as side slides, a front lip, or a raised back panel.
That order gives you a workable rectangle before you start dividing socks, belts, or folded shirts into compartments. IKEA’s KOMPLEMENT drawer page is a useful example of why the distinction matters: it lists frame measurements separately from inside width, inside depth, and maximum pull-out depth. Those numbers describe different parts of one drawer, not interchangeable organizer dimensions.
Empty the drawer and open it as far as it normally goes
Remove the contents before you measure. A soft pile of clothes can hide a slide cover, a screw head, or a shallow slope where the drawer bottom meets the back. Pull the drawer out to the position you can actually use while sorting it. If it stops before the back is easy to reach, that affects how useful a deep organizer will be.
Look for four limits:
- The narrowest point between the inside side walls.
- The inside floor from the front wall to the back wall.
- The lowest point above the drawer floor when it closes.
- Hardware, rails, corner blocks, or a curved front that crowds an organizer.
Use a metal tape or a ruler that can sit flat against the surface. Hold it at drawer-floor height for width and depth; measuring across the top edge can add space that a box cannot use. If the drawer sides taper or the front is thicker than the rest, take a second measurement near that tighter spot and keep the smaller number.
Record three inside measurements, then add the obstructions
Write the measurements down separately. One overall drawer size is not enough to compare a tray with a tall bin or a set of adjustable dividers.
| Measure | Where to place the tape | What it affects |
|---|---|---|
| Inside width | Side wall to side wall at the narrowest point | Whether organizer sections can sit side by side |
| Usable depth | Inside front wall to the back limit on the floor | Whether a tray leaves a reachable front edge |
| Inside height | Drawer floor to the lowest closing point | Whether a lid, divider, or stacked item can clear |
Next, make a quick obstruction note. A slide that sits inside the drawer, a back panel that projects forward, or a front wall that is taller than the usable opening can make a tidy grid look wrong once it is in place. Draw a simple rectangle on paper and notch out the space each part occupies. You do not need a scale drawing; the point is to avoid treating the whole floor as empty.
Compare organizer measurements with the usable rectangle
Use the organizer’s outside dimensions for the comparison. Its inside capacity tells you what it can hold, but the outside width, depth, and height determine whether it can sit in the drawer and let it close.
Keep a modest gap at the sides and front rather than aiming for a press fit. That gap gives a tray room to lift out for cleaning and keeps a flexible fabric edge or an adjustable divider from curling against the drawer wall. If you want more than one piece across the drawer, add the widths together first, then compare that total with the drawer’s narrowest measurement.
A simple note can keep the decision clear:
| Check | Drawer figure | Organizer figure | Decision |
|---|---|---|---|
| Side-to-side | Narrowest inside width | Outside widths of all sections | Keep a small side gap |
| Front-to-back | Usable floor depth | Outside depth | Leave a front edge you can reach |
| Closing clearance | Lowest inside height | Outside height, including rim | Confirm the drawer closes freely |
If the organizer only fits when it is forced behind a rail or pressed hard against a side wall, choose a smaller footprint or split the layout into two pieces. Filling every visible inch is less useful than a setup you can remove and reset without catching it.
Check the closing path before you repeat the layout
Place one empty organizer or a cardboard stand-in in the intended position. Open and close the drawer slowly, then lift the stand-in out from the front and from the back. This catches a common surprise: the organizer sits on the floor but reaches a taller front wall or a point where the drawer passes under a frame.
Pay attention to the item you plan to store as well. A divider can clear the drawer, while a folded sweater or a tall bottle above the divider may not. Test the drawer with a representative item in its usual position before you fill every compartment.
For a system drawer, consult the maker’s own dimensions for that drawer rather than borrowing a measurement from a similar-looking model. The cited KOMPLEMENT example has named inside dimensions and a separate maximum pull-out depth, and it fits a specified frame; those figures are a reminder that a drawer’s usable space belongs to that particular construction.
A five-minute measuring checklist
- Empty the drawer and open it to its normal working position.
- Measure inside width at the tightest point, along the drawer floor.
- Measure usable depth on the floor and inside height at the lowest closing point.
- Note slides, rails, lips, back panels, and any tapered walls.
- Compare those figures with the organizer’s outside dimensions, then test one piece through the closing path.
Evidence boundary
This is a fit-planning method, not a claim that every drawer or organizer follows the same dimensions. Recheck the actual drawer and the organizer’s stated outside size before arranging a full set; manufacturer instructions remain the source for a particular drawer system.
Frequently asked questions
What should I measure inside a closet drawer before adding organizers?
Measure the narrowest inside width, usable depth, and lowest inside height. Also note drawer slides, a front lip, or a rear panel that takes space from the rectangle an organizer can use.
Should I use a drawer exterior size to choose an organizer?
No. Outside dimensions include the drawer walls and may not reflect the space occupied by slides or hardware. Compare an organizer with the interior measurements instead.
How much space should I leave around a drawer organizer?
Leave enough room for the drawer to close without rubbing and for the organizer to be lifted or adjusted. The amount depends on the drawer wall, divider, and organizer shape, so check the actual opening.