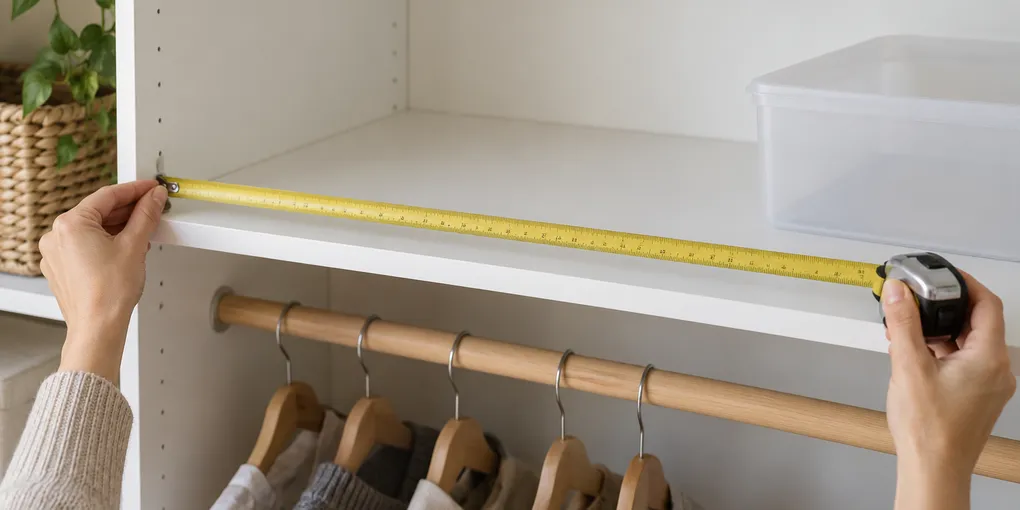
A bin can match the number on a closet shelf and still be frustrating to use. Measure the shelf’s clear width, usable depth, and clear height at their tightest points, then compare those numbers with the bin’s outside dimensions. Leave room at the front for the bin’s rim and for your hand to pull it out.
That short check prevents the familiar version of a storage mistake: a bin slides onto an empty shelf but catches on a bracket, fills the whole depth, or becomes hard to remove once the closet door is shut. The goal is not to fill every inch. It is to leave a shelf you can reach into and reset without wrestling a container.
Empty the shelf long enough to see its real limits
Take everything off the shelf before measuring. Folded linens and soft baskets can hide a shelf support, a bowed edge, or a side panel that narrows the usable space. The Home Depot’s closet-planning guide starts with accurate wall measurements; for a finished shelf, use the same attention on the actual surfaces that surround the bin. The Container Store’s small-closet guide likewise calls for width, depth, height, and a note about obstructions.
Look at four places before extending the tape:
- The two inside side walls or shelf dividers.
- The front lip and the back wall.
- The underside of the shelf above.
- Any bracket, cleat, hinge, trim, or door that comes into the opening.
You are looking for the part that makes the smallest opening, not the broadest empty-looking patch. A shelf can be wider in the center than it is beside a vertical support. A wire shelf can offer generous air above it but lose usable depth where the rail turns down at the front.
Record width, depth, and height separately
Write down three measurements rather than trying to remember one overall size. They answer different fit questions.
| Shelf measurement | Measure from | What it tells you |
|---|---|---|
| Clear width | Inside edge to inside edge at the narrowest point | Whether bins can sit side by side |
| Usable depth | Back wall to the front point where a bin can still be gripped | How far a bin can extend without blocking access |
| Clear height | Shelf surface to the lowest point above it | Whether a lid, rim, or stacked bin has room |
For width, measure near the front and again near the back. Use the smaller result if the shelf sides are not perfectly parallel. For depth, put the tape on the shelf surface and measure to the front edge you can realistically use; do not count a few inches that would be covered by a door or would leave no place for your fingers.
For height, measure below the shelf above, a hanging rod, or any bracket that crosses the opening. The clearance near the middle may look generous while a support at one side limits a tall lidded bin. Home Depot’s DIY shelf guide also bases shelf spacing on the height of what will be stored, which is the useful comparison here: measure the space you have before deciding on the container shape.
Compare against the bin’s outside dimensions
When you look at a bin, use its outer width, depth, and height. The space inside the bin tells you what it can hold; the outer dimensions decide whether it can live on the shelf. Include a projecting lid, molded handles, a rim, wheels, or a label holder if any of them extend past the body.
Avoid translating a product name into a size. Labels such as “small,” “under-shelf,” or “12-quart” do not tell you whether two bins will fit across a particular shelf. Two containers with similar capacity can have very different footprints.
Make a plain comparison before committing to a layout:
| Check | Shelf number | Bin number | Decision |
|---|---|---|---|
| Width | Narrowest clear width | Outside width × number of bins | Leave a small side gap |
| Depth | Usable depth | Outside depth | Keep a finger space at the front |
| Height | Lowest clear height | Outside height with lid | Leave room to lift or tilt the bin |
If a bin fits only when it is pushed flush to the back and pressed against a side wall, treat that as a signal to choose a narrower or shallower shape. A little open space is what lets you remove one bin without disturbing the row beside it.
Check the pull-out path, not just the parked position
A bin is not useful merely because it can sit on the shelf. Hold a cardboard box, an empty bin, or a folded piece of paper to the proposed footprint and practice the motion of pulling it forward. Notice where your knuckles meet the shelf lip, where a closet door swings, and whether a handle needs to clear a bracket.
This is especially helpful for the back row of a deep shelf. A deep container may maximize volume but hide the items behind its front edge. If you need to see or reach the contents often, a shorter bin or two shallow bins can make the shelf easier to use than one container that occupies the full depth.
For a shelf above a hanging rod, also consider the approach. You may be able to lift a bin into place from directly below, but not tip a tall lidded container out once clothing occupies the rod. Keep the measurement notes with the closet for the next time you replace a bin or change what the shelf stores.
Use one sample before repeating a row
Before buying several matching bins, test one with the measurements. Put it in the intended spot, close the door if there is one, and remove it with the shelf arranged as it will be in ordinary use. This is where an overlooked hinge, a raised shelf lip, or a handhold problem usually shows up.
If the sample works, use its outer measurements to plan the rest of the row. If it does not, change one dimension at a time: choose a narrower bin for side-to-side clearance, a shallower one for grip room, or a lower one for clearance above the lid. Changing the layout is often easier than forcing a nearly fitting bin to do a job it cannot do comfortably.
A quick shelf-measuring checklist
- Clear the shelf and note brackets, hinges, trim, and door swing.
- Measure the narrowest clear width, usable depth, and lowest clear height.
- Compare those numbers with the bin’s exterior dimensions, including the lid and handles.
- Reserve a front gap for fingers and a little side space between bins.
- Test one bin’s pull-out path before repeating the arrangement.
Evidence boundary
This is a physical-fit checklist, not advice about shelf weight limits, installation, accessibility, or structural safety. Use the shelf and bin makers’ instructions for those questions, and remeasure the exact opening and container before buying or rearranging.
Frequently asked questions
What shelf measurements do I need for storage bins?
Record the clear inside width, usable depth, and clear height at the tightest point. Then compare those figures with the bin’s exterior dimensions, including its lid or rim.
Should a storage bin match the shelf depth exactly?
No. Leave a little room at the front so the bin can be gripped and pulled out. A bin that reaches the back wall may still be awkward if its lip sits tight against the shelf edge.
Why does a bin fit empty but not when the closet door is closed?
A door, hinge, trim, shelf support, or pull-out path can occupy space that is not obvious when you only measure the back of the shelf. Check the front edge and the route the bin takes out of the closet.