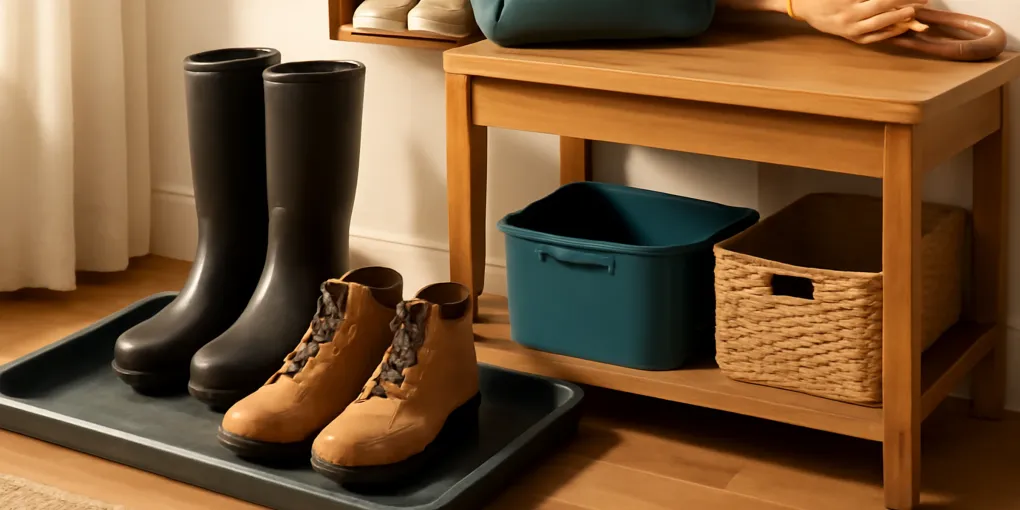
Best Boot Trays for Rainy Entryways: Contain Wet Shoes Before the Hallway Gets Slick
Buyer's GuideOttomanson Rubber Collection boot tray
Quick picks
| Product | Key Specs |
|---|---|
| See price on Amazon | — |
| See price on Amazon | — |
| See price on Amazon | — |
Product availability, certifications, and retailer details can change; check the current Amazon page before buying.
A boot tray is not just a place to park shoes. In a rainy entryway, it is the boundary between wet footwear and the walking path. Without a boundary, shoes drift from the mat to the hall, water spreads under bags, and the first person walking through in socks becomes the floor-drying system.
This guide is for homes where the problem is wet shoes near the door, not a full closet rebuild. If shoes and bags are both blocking the route, start with the hallway drop zone protocol. If reusable grocery bags are the pile by the door, use the reusable grocery bag storage protocol instead.
Quick picks
- Best default plastic tray: Search Amazon for Ottomanson Rubber Collection boot trays. Pick this when you need a low-cost waterproof boundary near an apartment or side door.
- Best visible mudroom tray: Search Amazon for Good Directions galvanized boot trays. Pick metal when the tray stays in sight and the floor can tolerate the material.
- Best wet-weather mat tray: Search Amazon for Waterhog boot trays. Pick this when shoes arrive soaked and you prefer absorption over a puddle pan.
What a boot tray has to solve
A good tray solves containment, drying, and foot traffic. Containment means water, grit, leaves, and sidewalk salt stay inside the tray. Drying means the soles are not trapped in standing water all night. Foot traffic means the tray does not become a new obstacle exactly where people step through the door.
Falls guidance from the CDC emphasizes removing trip hazards and keeping walking paths safer for daily movement (CDC falls prevention). A boot tray helps only if it creates a stable shoe zone beside the path, not a slippery plastic island in the path.
Best default: raised-lip plastic tray
A raised-lip plastic tray is the practical default for most rainy entries. It is inexpensive, washable, and light enough to move when you clean the floor. Look for a rim high enough to catch meltwater but not so tall that children or older adults catch a toe on it.
Best fit: apartment doors, side entries, garage-to-kitchen doors, and households that need the tray only during wet months.
Avoid if: the tray will sit in a formal entry where appearance matters more, or if heavy work boots will flex the tray until water sloshes over the rim.
The detail that matters is usable interior space. Product dimensions often include the outer lip. Measure the shoes that land together, then leave a few inches between pairs so one wet boot does not lean into the dry pair.
Best visible option: galvanized metal tray
A galvanized tray makes sense in a mudroom, farmhouse entry, or side hall where the tray is always visible. Metal trays usually look less like temporary cleanup gear. They also feel more stable under heavy boots.
The tradeoff is floor contact. A metal tray can scrape wood, tile, or painted floors if it has sharp seams or no protective feet. Before buying, check whether the bottom is smooth and whether you can add felt pads. Do not assume a tray that is fine on garage concrete is fine on a finished entry floor.
Metal also feels colder and can ring when shoes are dropped into it. That is not a dealbreaker, but it matters in small apartments where the entry is near living space.
Best for soaked shoes: absorbent mat tray
An absorbent boot mat or tray works when shoes are wet enough that a plain tray becomes a puddle. The goal is not to hide water. The goal is to spread moisture across a washable surface so shoes dry instead of sitting in runoff.
Choose this style for snow, slush, and rainy school drop-offs. Avoid it if the household will never wash or air-dry the mat. A saturated mat becomes a damp object by the door, not a solution.
If you use an absorbent mat, build a drying habit into the setup. Lift it weekly during wet weather, check the floor underneath, and wash or hang it when it stays damp.
Fit checklist before buying
| Check | Why it matters |
|---|---|
| Door swing | The door should not push the tray into the walking path |
| Wet-pair count | Size for the shoes that arrive together, not every shoe owned |
| Rim height | A raised edge catches water but should not create a toe-catching ledge |
| Floor surface | Wood and painted floors need smooth bottoms or protective pads |
| Cleaning route | The tray should be easy to lift, rinse, and dry |
Placement rules that prevent a new hazard
Put the tray beside the step path, not directly in the step path. The best location lets someone enter, stand on a mat, remove shoes, and move the wet pair sideways onto the tray. If a person has to balance on one foot while reaching around the door, the tray is in the wrong place.
Keep one dry standing spot next to the tray. That dry spot is what makes shoe removal feel easy. If the tray consumes the whole landing, wet shoes may be contained but the entry still feels chaotic.
For families, mark the tray capacity. If it holds four pairs, it holds four pairs. Extra shoes go to the closet, rack, or bedroom. A tray that becomes a permanent shoe archive stops drying and starts blocking.
What to avoid
Avoid shallow decorative trays that look good only when empty. A quarter-inch lip is not enough for real rain. Also avoid oversized trays that cover the main walkway. More tray is not automatically safer; a huge tray can become the trip hazard it was supposed to prevent.
Do not put a boot tray over cords, uneven thresholds, or loose rugs. ESFI warns that electrical cords should be used safely and kept from damage or unsafe routing (ESFI extension-cord safety). Wet shoes and hidden cords do not belong in the same entry zone.
One-week entryway test
After a week of rain, check three things. First, is water staying inside the tray? Second, are shoes actually landing there without reminders? Third, can people pass through the entry while carrying bags?
If the answer is no, adjust placement before buying another product. Move the tray closer to the natural shoe-removal spot, remove extra dry shoes, or add a small rack for off-season pairs. The right tray should shrink the wet zone, not become another surface to manage.
Apartment, mudroom, and garage-door differences
An apartment entry usually needs the narrowest useful tray because the same few feet handle keys, mail, packages, and shoes. Choose a tray that fits parallel to the wall and does not force the door to swing across wet boots. If there is no side clearance, use a two-pair tray and move dry shoes to a closet every evening.
A mudroom can handle a larger tray, but that space often fails because every outdoor shoe stays there forever. Use the tray for wet arrivals only. Put dry boots on a rack, shelf, or bench cubby so the tray can dry between storms. If the mudroom also stores sports gear, keep cleats and muddy equipment in a separate washable bin so the boot tray does not become a general dirt catcher.
A garage-entry door needs a tray that tolerates grit and heavier soles. Plastic is fine, but a flimsy tray may flex when work boots land on one edge. If the tray sits near stored tools, paint, or car supplies, leave a clear walkway between the wet footwear zone and anything that could be knocked over.
How to handle kids’ shoes
Kids’ shoes make boot trays fail because the pairs are smaller, wetter, and more likely to be dropped sideways. Give children the front edge of the tray, not the back corner. A child who has to reach over adult boots will drop shoes in the walking path.
For preschool and elementary-age kids, a picture label on the wall or bench can help, but the tray itself should stay unlabeled and washable. Put the smallest shoes together in one half and adult boots in the other. If snow pants, backpacks, and lunch bags also land there, the issue is no longer a boot tray; it is an entryway drop-zone capacity problem.
Boot Tray FAQ
What size boot tray is best for a small entryway?
Choose the smallest tray that holds the wet pairs that actually arrive together, usually two adult pairs plus one child pair for a narrow apartment entry.
Should a boot tray have a raised edge?
Yes. A raised lip is the feature that keeps meltwater and grit from spreading into the walking path.
Where should a boot tray go?
Place it beside the door but out of the main step path, with enough room for someone to stand while removing shoes.
Can I use a boot tray indoors on wood floors?
Yes, but choose a smooth-bottom tray or add floor-safe pads. Lift it regularly so trapped grit or moisture does not sit against the floor.
Is a boot tray better than a shoe rack?
For wet shoes, yes. A rack stores shoes vertically but often lets water drip down. A tray is better for the first drying stop; a rack can handle dry overflow.
How often should I clean a boot tray?
Rinse or wipe it whenever grit builds up, and dry underneath it during long wet stretches. A dirty tray can track residue back into the same path you were trying to protect.
Sources
- CDC falls prevention: https://www.cdc.gov/falls/prevention/index.html
- ESFI extension-cord safety tips: https://www.esfi.org/extension-cord-safety-tips/