Donation Outbox Protocol: How to Get Decluttered Items Out of the House
ProtocolAn effective donation outbox is not just a box for unwanted items. It is a small logistics system that moves decisions out of the house. The goal is to prevent decluttered items from becoming a second layer of clutter in the hallway, garage, laundry room, or car trunk.
Why Donation Piles Stall
Most decluttering advice treats the decision to let go as the finish line. In a working home, that is only the first half of the job. The item still needs a container, a destination, a transport route, and a deadline. Without those pieces, the donation pile becomes another undecided category.
Behavior research on habits is useful here. Wendy Wood and David Neal have described how repeated behavior depends heavily on context cues and friction, not just motivation. A donation bag sitting in a random corner has weak cues. A labeled bag next to the door used for errands has a stronger cue and lower friction.
Visual-attention research also matters. McMains and Kastner, 2011, found that competing stimuli can reduce attentional control (doi:10.1523/JNEUROSCI.3766-10.2011). A hallway pile of mixed bags, boxes, toys, clothing, and returns creates the same kind of visual competition at home. The outbox should reduce decisions, not advertise unfinished work every time you walk by.
Step 1: Pick the Exit, Not the Pretty Spot
Start with the exit path. If donations leave by car, put the outbox near the garage door, mudroom, or the closet closest to the parking spot. If you use walkable drop boxes, put it near the front door. If your building has a charity pickup room, use the closet or shelf nearest that route.
Do not choose a beautiful corner that is far from the leaving behavior. The outbox is not decor. It is a transfer station. If you have to remember to carry the bag across the house, the system is too dependent on motivation.
Good outbox locations include:
- A labeled shelf in the entry closet.
- A covered bin in the mudroom.
- A single garage shelf beside reusable shopping bags.
- A laundry room corner if donations leave during errands.
- A small bench cubby if it is not needed for daily shoes.
Bad locations include bedroom corners, dining chairs, guest beds, stairs, and the back of the car with no scheduled drop-off.
Step 2: Separate Destinations Before They Mix
A common failure is putting every outgoing item into one bag. Donations, returns, hand-me-downs, textile recycling, library books, and repair items look similar once bagged. Then the household has to re-sort them later, which delays removal.
Create destination labels instead of room labels:
| Destination | Container | Deadline |
|---|---|---|
| Donate | Sturdy reusable bag or handled bin | Weekly or biweekly |
| Return | Clear pouch or shallow tray with receipt | Before return window closes |
| Give to person | Labeled bag with recipient name | Next planned handoff |
| Textile recycling | Separate bag, not mixed with donations | Monthly route |
| Repair | Small bin with deadline card | Repair date or discard date |
Useful product searches include collapsible storage crates, heavy duty reusable tote bags, label maker tape, and entryway storage bench. These are search links because no direct ASINs were verified during drafting.
Step 3: Build the Three-Bin Version
Most homes need only three outgoing categories at first:
- Donate.
- Return.
- Give to person.
If you add too many categories on day one, the system becomes another sorting project. Start with three labeled containers and add textile recycling or repair only if those categories appear weekly.
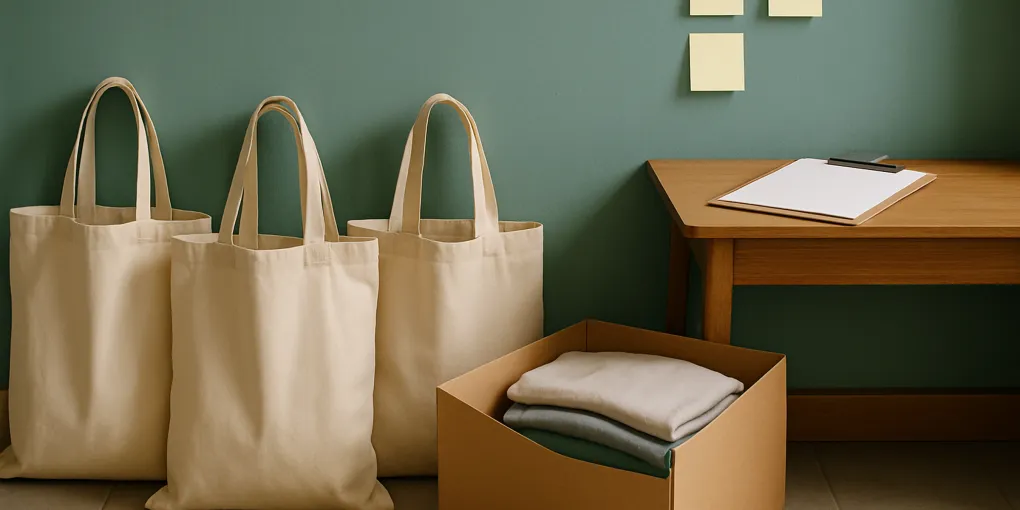
The donation container should be easy to carry. A large open bin looks efficient until it becomes too heavy to lift. Use smaller bags inside a bin if your household creates donations quickly. For fragile items, use a box with padding and a visible label so it does not become a mystery carton.
Step 4: Add a Deadline Card
Every outbox needs a deadline. Write the next drop-off date on an index card, whiteboard label, or phone reminder. The deadline turns the outbox from passive storage into active workflow.
A useful rhythm is one of these:
- Friday errand route: donations leave every Friday.
- First Saturday: larger drop-off once a month.
- Pickup calendar: schedule charity pickup before decluttering bulky areas.
- Car rule: one bag may enter the trunk only if it leaves at the next errand stop.
Do not rely on the sentence “I’ll take it next time.” That sentence is how donation bags become trunk clutter.
Step 5: Protect the Outbox From Re-Shopping
An outbox is vulnerable because items inside are not gone yet. Household members may pull things back out, especially clothing, toys, books, and hobby supplies. That does not mean the system failed, but it needs boundaries.
Use one of these rules:
- Closed bag rule: once an item is in the donation bag, it is not browsed casually.
- Review window rule: family members have one day to rescue items, then the bag closes.
- Owner rule: personal items require owner approval before donation.
- No floor rule: outgoing items must fit in the outbox containers or the drop-off happens sooner.
For kids, use a clear “give away” bag and a short review window. For shared household goods, use a temporary label such as “donate Friday unless claimed.” The goal is respect without indefinite delay.
Step 6: Handle Unsafe or Unsuitable Items Separately
Donation is not disposal. Do not donate broken appliances, recalled products, expired car seats, dirty textiles, incomplete toys, leaking batteries, opened personal-care products, or anything unsafe. The U.S. Consumer Product Safety Commission maintains recall information, and donation centers often publish item-specific restrictions. Check local rules before donating regulated, bulky, or child-safety items.
Create a separate disposal or recycling path for items that should not be donated. Batteries, electronics, paint, chemicals, and medicine usually need specialized routes. Mixing them into a donation bag creates work for someone else and may create safety issues.
Outbox Sizing Guide
| Household pattern | Best container | Why it works |
|---|---|---|
| One-person apartment | One handled tote | Easy to carry on errands |
| Family with kids | Two labeled bins | Separates toys/clothes from returns |
| Frequent online returns | Tray plus clear pouch | Keeps labels and receipts visible |
| Garage drop-off route | Collapsible crates | Can load directly into car |
| Small entryway | Hanging tote on hook | Uses vertical space without floor pile |
Choose the smallest container that can hold one removal cycle. A giant bin may look efficient, but it can hide stalled items for months. Capacity should match the schedule.
Maintenance Reset
Once a week, ask four questions:
- What leaves the house this week?
- What needs a destination label?
- What does not qualify for donation?
- What category appeared often enough to deserve its own container?
Add one practical audit step before the reset ends: touch every container and name its next action out loud. “Donate Friday,” “return by May 8,” “text Jamie,” or “electronics recycling” is specific enough. “Deal with later” is not. If a container cannot get a next action, it is probably holding mixed categories and should be split or emptied.
The outbox is working when decluttered items move through it quickly and the household can tell what happens next without asking you.
Composite Score Method
For this protocol, ClutterScience uses the standard weighted scoring breakdown: Research 30%, Evidence Quality 25%, Value 20%, User Signals 15%, Transparency 10%. The research component looks at whether the system reflects habit design, attention load, consumer-safety constraints, and realistic home logistics. Evidence quality favors principles that can be checked against sources or observed in normal household behavior. Value asks whether the setup prevents repeat clutter without requiring expensive products. User signals come from common failure patterns: donation bags in trunks, hallway piles, return-window misses, and mixed outgoing categories. Transparency means the limits are clear: this protocol does not replace local donation rules, recall checks, or hazardous-waste guidance.
Using that framework, the highest-scoring version is a modest three-category station with a fixed removal date. It is less glamorous than a full mudroom wall, but it solves the real bottleneck: items need to leave. Expensive benches, oversized bins, and decorative sorting towers score lower if they increase holding capacity without increasing removal frequency. In this category, more storage can make the problem worse because it delays the final step.
Example Setups
In a small apartment, use one handled tote for donation and one document tray for returns. Hang the tote on the inside of the coat closet door or place it on the floor only if it does not block the door swing. The removal rule is simple: when the tote is full, it leaves on the next errand.
In a family entryway, use two open bins on a low shelf: donate and return. Add a small envelope for receipts and QR codes. If kids re-shop the donation bin, use closed reusable bags after the review window ends.
In a garage, use collapsible crates rather than a giant open pile. Crates can be lifted directly into the car, and each crate can have one destination. Avoid stacking unlabeled cardboard boxes, because they turn completed decisions back into mystery storage.
In a household with frequent online returns, separate returns from donations completely. Return items need packaging, labels, receipts, and deadlines. Donations need condition checks and drop-off timing. Mixing them creates avoidable rework.
Sources and Evidence Notes
- Wood, W., and Neal, D. T. “A new look at habits and the habit-goal interface.” Psychological Review, 2007. doi:10.1037/0033-295X.114.4.843.
- McMains, S., and Kastner, S. “Interactions of top-down and bottom-up mechanisms in human visual cortex.” Journal of Neuroscience, 2011. doi:10.1523/JNEUROSCI.3766-10.2011.
- U.S. Consumer Product Safety Commission recall database and safety guidance for consumer products.
- U.S. Environmental Protection Agency household hazardous waste guidance for items that require specialized disposal.
Frequently Asked Questions
Where should a donation outbox go?
Put it near the exit path used for errands or pickups. The best location is close enough to leaving behavior that removal feels automatic.
How long should items stay in a donation outbox?
Use a scheduled weekly, biweekly, or monthly removal cycle. If items stay longer than one cycle, shrink the categories or move the outbox closer to the exit.
What should not go in a donation outbox?
Avoid unsafe, recalled, broken, expired, soiled, or incomplete items. Route those to repair, recycling, hazardous-waste disposal, or trash as appropriate.
Bottom Line
A donation outbox succeeds when it is tied to an exit, sorted by destination, and governed by a deadline. The box is not the system. The leaving routine is the system.
Keep the station small enough that it creates action rather than storage. If the outbox becomes another closet, shrink it and shorten the removal cycle.
Frequently Asked Questions
- Put the donation outbox near the exit you actually use, such as a mudroom, entry closet, garage door, or laundry room. It should be visible enough to leave the house but not so central that it becomes household clutter.
- Use a fixed pickup or drop-off rhythm, usually weekly or every two weeks. Items should not stay in the outbox long enough to be re-shopped by the household.
- Do not put broken, recalled, unsafe, soiled, expired, or incomplete items in a donation outbox. Those need repair, recycling, disposal, or a specialized donation route.