Sewing Pattern Envelopes: Storage for Projects and Sizes
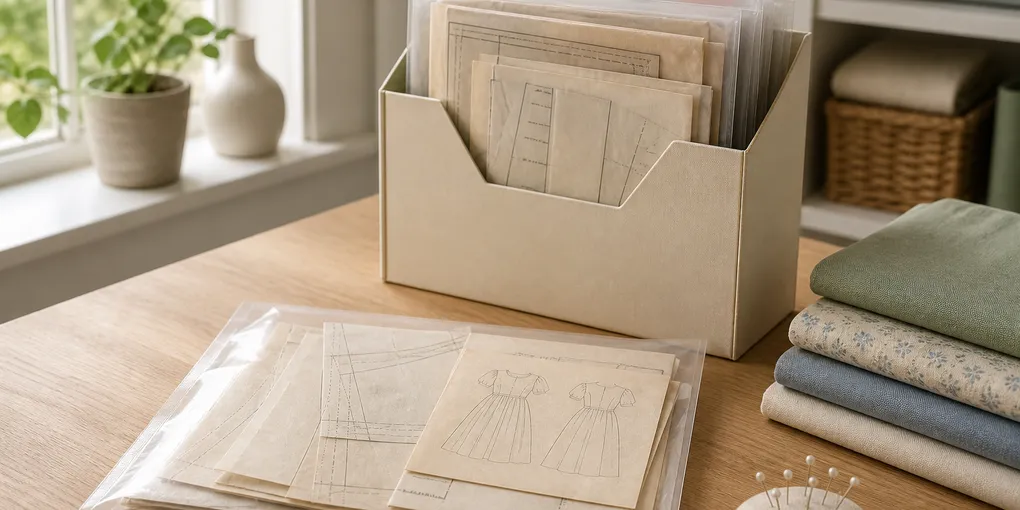
ProtocolWhen a sewing pattern is split between a crumpled envelope, a stack of tissue, and the last fabric scraps from a project, finding the right size can mean opening every packet you own. Keep each pattern’s original envelope, pieces, and instructions together; label the outside before filing it; and give the current project a different home from the archive.
The trick is not a larger bin. It is preserving the little clues that let you resume: the pattern number, the garment name, the size range, and any notes about the version you cut. Once those stay with the tissue pieces, an upright file box or a flat drawer becomes a place to retrieve a pattern rather than a place to restart the search.
Label the pattern before the pieces drift apart
Start while the tissue is still with its envelope. On the envelope or its outer sleeve, write the printed pattern number, brand, garment name, and size range. Those four details answer different future questions: a number lets you find an entry in a pattern list, a brand helps distinguish similar designs, a garment name jogs your memory, and the size range tells you whether the packet holds a size you can use before you open it.
Add one more cue only when it earns its place. For an active project, that might be “navy linen dress” or “shortened bodice.” For an archive, it might be the person the garment was intended for. Avoid trying to record every alteration on the outer label. A sleeve that reads like a project diary is slow to scan; keep detailed notes inside with the instructions instead.
| If you are looking for… | Lead the label with… | Keep inside the same sleeve or envelope |
|---|---|---|
| A named commercial pattern | Pattern number and brand | Original envelope, tissue pieces, instructions |
| A garment you remember making | Garment name | Pattern pieces, fit notes, cut-layout notes |
| A pattern for one person or size range | Size range after the pattern number | All cut or uncut sizes that still belong to that packet |
| The project currently on the table | Project name after the core pattern details | Fabric swatch, current notes, and pieces not yet returned |
Give the active project one visible home
An active pattern needs a place you can reach without unpacking the archive. Use one open file box, vertical tray, or shelf section near the cutting or sewing surface. Each project gets a single sleeve or large envelope. Put the pattern envelope, tissue pieces, instruction sheets, and traced-size notes into that one home at the end of a session.
The return step matters most after cutting. Loose pieces are easy to mistake for scraps, especially when several size lines have been trimmed away. Before clearing the table, check that the instruction sheet and every tissue piece have gone back into the project’s sleeve. If a piece stays pinned to fabric for the next session, keep a short note in the sleeve saying where it is; that is safer than filing an empty envelope and assuming the set is complete.
Keep the active container small enough that you can see each project. If it becomes a deep pile, it has stopped being an active-project spot and started acting like a second archive. Move a paused project out after the point you choose—perhaps after it has been set aside for a month, or after the garment is finished.
File the archive by how you will search
For the patterns you are not using this week, choose a filing route that matches the question you actually ask. Some sewists remember a pattern number. Others remember “the shirt with the gathered sleeve” or the pattern company. A household that sews for several people may start with the recipient, then add the garment type.
Use one primary route. An upright file box can hold labeled sleeves standing side by side, while a flat drawer can hold sleeves in a shallow stack. In either case, leave enough space to remove one pattern without bending the corners of the others. The National Archives advises keeping paper records in supportive, appropriately sized enclosures and avoiding overfilled containers; that is a practical guardrail for a working pattern collection as well. Their paper-record guidance also supports keeping related papers together in folders or other enclosures.
If your envelopes have multiple sizes but only one has been cut, do not create a separate file for each size line. Keep the original size range on the outer label and put the traced-size note inside. That preserves the connection between the design, the instructions, and the version you used.
Keep the parts that make a restart possible
A complete pattern file contains more than the tissue. Keep these together whenever they apply:
- The original envelope, even if its flap is torn.
- The instruction sheets and layout diagrams.
- Every tissue piece, including facings, pockets, collars, and small guide pieces.
- A brief note about the size you traced or cut, plus any alteration worth repeating.
- A small fabric swatch only if it helps identify an unfinished project.
There is no need to save every shopping receipt, thread card, or loose clipping in the same sleeve. Those extras make the file bulky and hide the pieces you need first. Save a note that changes the next cutting or sewing decision; let unrelated supplies live elsewhere.
For a pattern that has been cut apart, a clear sleeve or a larger plain envelope can be the outer container while the original envelope stays inside. The goal is not to make the packet look new. It is to prevent a sleeve of anonymous tissue from becoming impossible to identify.
Make one closing routine after each sewing session
Before you put away the machine, take two minutes to reset the pattern rather than the whole room:
- Collect the tissue pieces from the table and check them against the instructions or your current step.
- Return the pieces, instructions, and notes to the sleeve with the original envelope.
- Add or update the project cue only if it will help you find the set again.
- Put the sleeve back into the visible active container, or move a finished project to the archive.
- Leave the next project’s sleeve in the front only when you expect to use it next.
This small reset separates project storage from fabric storage. Fabric can be sorted by yardage, color, or intended garment; patterns should be sorted by retrieval clues and kept as complete sets. If fabrics are currently obscuring the pattern area, the broader craft-storage organization guide can help you assign them a separate zone.
Preservation boundary for older or fragile patterns
This is a household retrieval system for ordinary working patterns, not a conservation method for rare, brittle, historic, or especially valuable paper. Storage can keep known pieces together, but it cannot recreate a missing tissue piece or confirm an original size range after the envelope is gone.
If a pattern is unusually fragile or important to preserve in its present condition, use collections-care guidance before unfolding, repairing, or changing its enclosure. The National Archives recommends containers that fit papers without bending or overstuffing and keeping family papers away from damp, hot, or leak-prone storage areas in its family-archives storage guidance. For an everyday project, preserve the envelope and instructions with the pieces; for a special item, treat care as a separate decision.
Set up the first pattern file today
Pull out one pattern you want to use again. Put its envelope, instructions, and tissue pieces into one sleeve. Add the pattern number, brand, garment name, and size range to the outside. Then choose only one place for it: the active-project container if you will return to it soon, or the archive if you will not.
Repeat that with the next pattern when it crosses your table. You do not need to relabel an entire collection before the system starts working. The first complete, findable packet is the beginning of the archive.
Sources
Frequently Asked Questions
- Yes, when you still have it. The envelope gives the pattern a natural home and usually carries the number, brand, garment name, and size information you may need later. Keep the envelope with the tissue, instructions, and notes even if all of them move into a larger sleeve.
- Put every cut tissue piece, the instruction sheet, and any traced-size notes in one labeled sleeve or envelope. Label the outside before filing it, then keep it in the active-project container or archive according to when you expect to use it next.
- Start with the printed pattern number, brand, garment name, and size range. Add the project name or fabric only when that extra cue will help you retrieve it; a long label is harder to scan than a short one.
- Give active projects a visible container near the sewing area and file paused or completed patterns separately. That keeps the next project within reach without making the archive harder to browse.