Under-Sink Cleaning Product Separation Protocol
ProtocolQuick picks
Under-sink leak tray
★ Top pick Best first reset tool- Note: Use a removable tray to contain drips and make bottle checks easier.
Child safety cabinet latch
Best access control- Note: Use when children visit or live in the home, and still keep hazardous products high when possible.
Handled cleaning caddy
Best daily-use organizer- Note: Separate daily cleaners from backup bottles so the cabinet is not searched bottle by bottle.
The cabinet under the sink is convenient because water, trash bags, dish tools, and cleaning products all seem to belong near it. That convenience is exactly why the space gets risky. A leaking bottle can soak paper goods. A child can reach a bright spray bottle. A spare cleaner can hide behind a pipe until nobody remembers what it is.
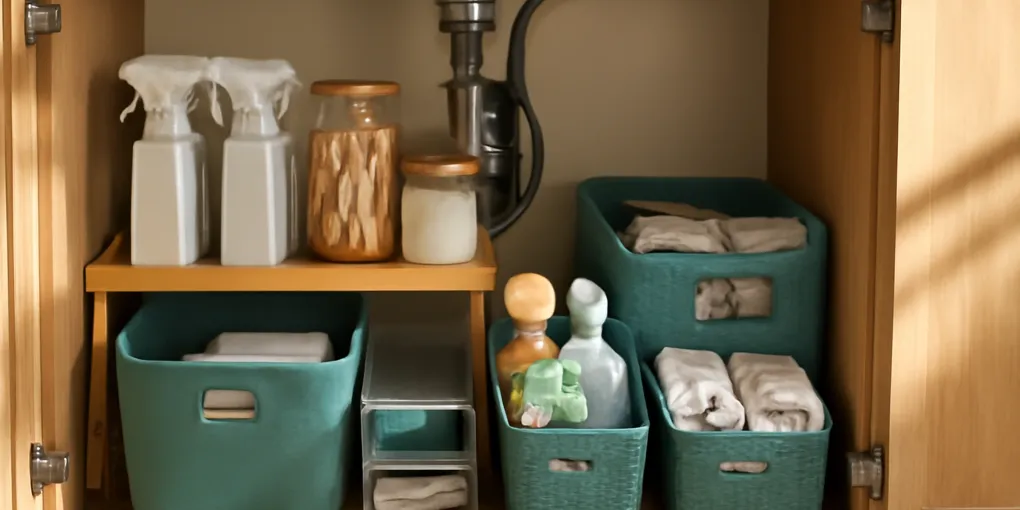
This protocol separates the cabinet into controlled zones: daily cleaners, backup products, dry supplies, and leak-prone items. It is not a chemistry guide and it does not replace product labels. It is a storage reset for making under-sink clutter easier to inspect and harder to misuse.
For a broader under-sink setup, see our under-sink organizer mistakes guide. This page is narrower: cleaning products, leaks, and access control.
Quick picks for under-sink cleaning storage
- Contain drips: Search Amazon for under-sink leak trays. A tray makes bottle leaks visible before they reach cabinet seams.
- Control access: Search Amazon for under-sink cabinet latches. Use a latch as one safety layer, not permission to store everything low.
- Separate daily cleaners: Search Amazon for handled cleaning caddies. A caddy keeps daily bottles from mixing with backups.
- Lift dry goods: Search Amazon for under-sink shelf risers. Use only if pipes and disposals leave stable clearance.
Why this cabinet needs stricter rules
HealthyChildren, from the American Academy of Pediatrics, advises families to store medicines, cleaning products, and chemicals out of reach and sight of children, ideally locked away (HealthyChildren childproofing guidance). The EPA Safer Choice program also focuses on safer chemical ingredients and clear product selection, but a safer choice label does not mean a product belongs loose in a child-accessible cabinet (EPA Safer Choice).
The storage takeaway is simple: under-sink organization is not just about neat rows. It is about access, label visibility, leak visibility, and keeping incompatible household categories apart.
Step 1: empty the cabinet onto a protected surface
Put down a towel or tray and remove every item. Keep children and pets away from the sorting area. Do not combine liquids, pour mystery products together, or wipe labels off while sorting. If a bottle is leaking, place it in a temporary container and follow the product label for cleanup and disposal.
Sort into five groups:
- Daily cleaners used weekly.
- Backup cleaners and refills.
- Dish and sink tools.
- Dry supplies such as trash bags and sponges.
- Items that do not belong, such as medication, food, pet items, batteries, or paperwork.
The fifth group is the most important. Under-sink cabinets become unsafe when unrelated categories drift into a chemical storage zone.
Step 2: remove what should not live low
If children live in or visit the home, move hazardous products out of reach and sight when possible. A cabinet latch is helpful, but it is not a substitute for adult-controlled storage. Products with strong warnings, concentrated refills, pest-control products, and anything with a damaged cap deserve a stricter location.
Do not store medication under the sink. Heat, humidity, and accidental access make it a poor fit. If medication clutter is the issue, use a separate medicine reset such as a lock box and follow FDA disposal guidance for unused medicines (FDA unused medicine disposal).
Step 3: create a leak-control base
Line the cleaning-product zone with a removable plastic tray, boot tray, or under-sink mat with raised edges. The goal is inspection, not decoration. You should be able to pull the tray forward and see whether a bottle has dripped.
Avoid cardboard boxes for liquid storage. Cardboard absorbs leaks, hides dampness, and collapses when wet. If you use bins, choose washable bins and keep labels visible from the front.
Step 4: separate daily-use bottles from backups
Daily bottles belong in a handled caddy or front tray. Backups belong behind or above them, ideally in fewer categories. If every cleaner is in the daily zone, the cabinet becomes a search pile. If daily cleaners are buried behind refills, people leave them on the counter.
Keep only the bottles you actually use. Duplicates grow when people cannot see what is already there. Write the open date on concentrated or specialty products if the label suggests freshness or storage limits.
Step 5: protect dry supplies from liquids
Trash bags, dishwasher tabs, sponges, microfiber cloths, and paper towels should not sit directly under leak-prone bottles. Put dry supplies on a shelf riser, side bin, or separate drawer. If a dry item must share the cabinet, keep it in a washable bin away from the liquid tray.
Do not put loose rags under spray bottles. A damp rag can hide a small leak and become the reason the cabinet smells bad. Clean cloths should be dry, folded, and separated from chemicals.
Step 6: label by action, not brand
Use simple labels such as daily cleaners, refills, dish tools, trash bags, and do not store here. Brand labels already exist on the bottles. Your cabinet labels should explain where items return.
If multiple adults use the cabinet, place the strongest products in the least convenient adult-only location. Convenience should favor safe daily products, not the most hazardous bottle.
Under-sink fit matrix
| Cabinet condition | Best reset | Avoid |
|---|---|---|
| Children visit the home | Lock or move hazardous products high | Assuming a simple bin is enough |
| Bottles have leaked before | Add a removable tray and monthly check | Cardboard boxes under liquids |
| Cabinet is deep and dark | Use a front caddy plus back backup bin | Buying more bottles because they are hidden |
| Dry goods share the space | Put dry goods in a separate raised bin | Stacking paper goods under sprays |
| Pipes reduce clearance | Use low trays and short bins | Tall drawers that hit plumbing |
Monthly inspection rule
Once a month, pull the liquid tray forward and check five things: loose caps, damp labels, sticky bottle bottoms, expired or discontinued products, and items that migrated into the chemical zone. The check should take less than five minutes. If it takes longer, the cabinet has too many categories.
When a bottle is empty, remove it immediately. Empty spray bottles are clutter because they make the cabinet look stocked when it is not.
Under-Sink Cleaning Storage FAQ
Can I store bleach under the sink?
Follow the product label and household safety needs. If children or pets can access the cabinet, store hazardous products locked away or higher when possible. Keep bleach away from unrelated products and never mix cleaners.
Should I use a lazy Susan under the sink?
A turntable can work for short daily bottles if it clears the plumbing. It is less useful for tall sprays and heavy refills because spinning can knock bottles over.
What is the best under-sink organizer for renters?
Start with a removable tray, handled caddy, and tension-free bins. Avoid drilling unless your lease allows it. A child latch may still be necessary if children visit.
How do I store cleaning cloths with cleaners?
Store clean cloths dry in a separate bin or drawer. Do not let cloths sit under spray bottles or leak-prone refills.
Bottom line
An under-sink cleaning cabinet should make risk visible. Use a leak tray for liquids, a caddy for daily products, a separate zone for dry goods, and a real access-control plan when children or pets are present. The cabinet is successful when every bottle label can be read, every leak would be noticed quickly, and unrelated items no longer drift into the chemical zone.
Frequently Asked Questions
- Only if the cabinet is controlled, dry, ventilated enough for the products stored there, and not accessible to children or pets. Follow each product label.
- Do not mix cleaners with food items, pet bowls, loose rags, medications, or anything that can absorb leaks and hide them.
- A latch helps, but safer storage may require moving hazardous products higher or to an adult-only area. Treat the latch as one layer, not the whole plan.
- Check monthly for leaks, expired products, damp cardboard, loose caps, and items that migrated into the wrong zone.