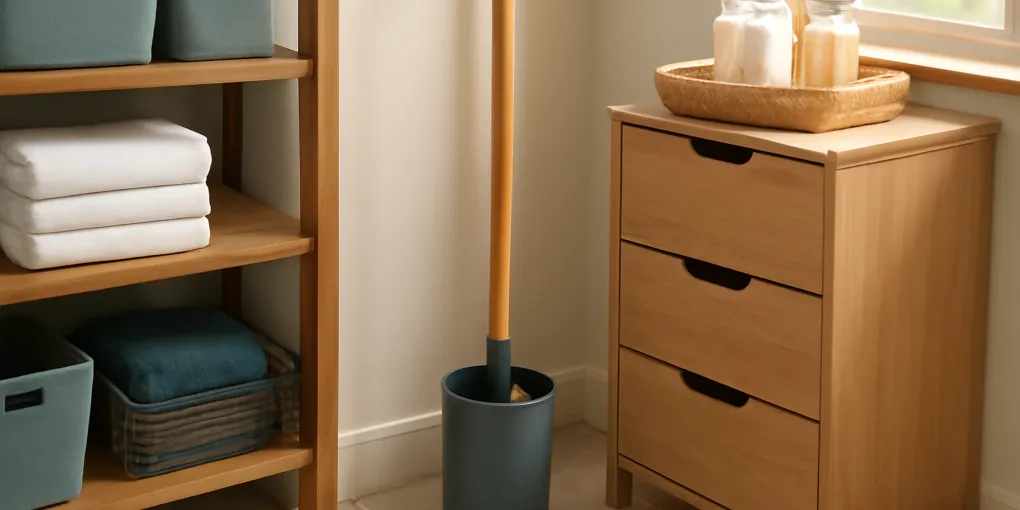
Bathroom Plunger Storage Protocol: Keep the Tool Accessible Without Turning It Into Floor Clutter
ProtocolQuick picks
| Product | Key Specs |
|---|---|
| See price on Amazon | — |
| See price on Amazon | — |
| See price on Amazon | — |
Product availability, certifications, and retailer details can change; check the current Amazon page before buying.
A plunger is one of the few bathroom tools that has to be nearby before anyone wants to think about it. That is why it often ends up loose on the floor, wedged behind the toilet, or hidden under the sink with bottles, towels, and backup soap. The goal is not to make a plunger decorative. The goal is to make it reachable, contained, and separate.
This protocol is for the small bathroom tool zone: plunger, toilet brush, gloves, and the cleaner used for the toilet area. If the broader cabinet is chaotic, start with how to declutter your bathroom. If medication is mixed into the same storage zone, use the medication lock box protocol first.
Quick starting point
- Beside-toilet holder: Search Amazon for covered OXO plungers. Use this when the plunger must stay in the room.
- Matched brush and plunger station: Search Amazon for simplehuman toilet caddies. Use this when a shared bath needs one contained tool footprint.
- Nearby supply caddy: Search Amazon for slim bathroom cleaning caddies. Use this for gloves and backup supplies, not for hiding a wet brush.
The rule: accessible, covered, separate
A bathroom plunger station has three requirements. Accessible means the tool can be reached during a clog without emptying a cabinet. Covered means the working end is not exposed where feet, towels, or children contact it. Separate means the tool is not stored with personal-care products, bath toys, paper goods, or clean linens.
The CDC’s home cleaning guidance separates cleaning and disinfecting tasks and emphasizes safe handling of cleaning products (CDC cleaning and disinfecting). The same logic applies to storage: toilet-area tools need their own controlled zone.
Step 1: remove the mixed pile
Empty the beside-toilet corner, the under-sink floor, and any bathroom caddy that currently holds toilet tools. Put plungers, brushes, gloves, toilet cleaner, disinfecting wipes, and backup heads in one temporary group. Put towels, cosmetics, medicine, bath toys, and paper products somewhere else.
Throw away broken holders, cracked brush cups, dried-out wipes, and duplicate plungers that no bathroom actually needs. Keep one working plunger per bathroom that has a toilet unless the bathroom is so close to another tool station that one clearly serves both.
Step 2: choose the station location
The best location is usually beside the toilet but outside the foot path. Leave room for cleaning around the base. A holder jammed between the toilet and wall may look hidden, but if it cannot be lifted and wiped around, grime will collect there.
In a tiny bathroom, a nearby hall closet can hold backup cleaner and gloves, but the plunger itself should not be so far away that someone has to leave the room during a clog. Under-sink storage is acceptable only when the plunger is dry, covered, and not touching other supplies.
Step 3: use a holder that can be cleaned
Choose a covered plunger holder or a divided brush-and-plunger caddy. Look for a base that does not tip when the tool is lifted. Avoid woven baskets, fabric bins, or decorative containers that cannot be washed. This is one place where washable plastic or metal beats a prettier material.
A covered canister is not maintenance-free. It still needs air, drying time, and occasional cleaning. If the holder traps water at the bottom, empty and clean it instead of assuming the cover solved the problem.
Step 4: separate chemicals from touch items
Do not store toilet cleaner with towels, skin-care products, toothbrush heads, or children’s bath items. HealthyChildren’s childproofing guidance emphasizes keeping household hazards out of children’s reach (HealthyChildren childproofing). In practice, that means toilet chemicals belong high, locked, or otherwise controlled in homes with children.
If the bathroom has no safe cabinet, move chemicals to a utility closet and keep only the covered tool station near the toilet. Convenience should not override separation.
Step 5: label the backup zone, not the tool
The visible holder does not need a label. The backup caddy does. Label one small bin for toilet-area refills: gloves, replacement brush heads, and the specific cleaner used in that bathroom. Do not let it become a general bathroom overflow bin.
If the caddy fills, do not buy a bigger one. Remove duplicates. A plunger protocol fails when the backup zone turns into the place where every awkward bathroom item goes.
Bathroom fit checklist
| Check | Keep it if | Move it if |
|---|---|---|
| Plunger | Covered, upright, reachable | Loose on floor or touching towels |
| Toilet brush | In a washable holder | In a decorative basket or open cup that tips |
| Toilet cleaner | Separated from personal items | Mixed with towels, medicine, or bath toys |
| Gloves | Dry and paired | Loose, wet, or stored on the floor |
| Backups | One labeled caddy | Spread through multiple cabinets |
Small-bathroom layout examples
One-bath apartment: keep one covered plunger canister on the floor side of the toilet that is least visible from the doorway. Store the toilet-brush refill heads, gloves, and disinfecting wipes in a separate under-sink bin so the floor station holds only tools that can be rinsed. If the vanity door hits the canister, choose a narrower covered plunger rather than sliding the tool behind the toilet, where it becomes harder to clean around.
Family bathroom: make the plunger visible enough that guests do not open every cabinet during a clog, but not so close to towels that drips can contact soft goods. A two-tool caddy can work if the base is washable and wide enough that the brush and plunger do not touch each other. Avoid wicker baskets and fabric bins for this job; they hide splashes and are harder to disinfect than smooth plastic or coated metal.
Powder room: if there is no vanity, use a covered canister plus one wall hook or slim shelf for backup supplies. The goal is not to create a full cleaning closet beside the toilet. It is to give the emergency tool a predictable home, keep it off absorbent materials, and leave enough floor clearance that mopping does not require moving five unrelated bottles.
What to buy today
Start with the cheapest safe fix: a covered plunger canister that fits the exact gap beside your toilet, plus a separate washable bin for gloves and refill supplies. Upgrade to a combination plunger-and-brush station only when the bathroom has enough floor width for the base to sit flat. Skip decorative baskets, open wire caddies with absorbent liners, and any holder that makes the wet rubber cup touch toilet paper, towels, bath toys, or skin-care products.
Maintenance rhythm
Once a week, lift the holder, wipe the floor underneath, and check whether the tool is dry. Once a month, clean the holder itself. After any clog, rinse and dry the plunger according to the product instructions and reset it into the holder instead of leaving it in the tub, shower, or corner.
The maintenance rhythm matters because bathroom tool clutter is usually invisible until someone needs the tool. A two-minute weekly check prevents the holder from becoming a forgotten grime pocket.
Bathroom Plunger Storage FAQ
Where should a bathroom plunger be stored?
Store it close enough to reach during a clog, but inside a covered holder or defined caddy so the tool is not loose on the floor.
Should the plunger go under the sink?
Only if it is fully dry, contained, and not stored with towels, personal-care items, or products children can access.
Can a toilet brush and plunger share one station?
Yes, if each tool has its own compartment and the holder can be cleaned.
Is it unsanitary to keep a plunger beside the toilet?
It can be acceptable if the plunger is upright, covered, dry, and in a washable holder. Loose floor storage is the problem.
What should not be stored with toilet tools?
Do not store toilet tools with towels, toothbrush supplies, cosmetics, medicine, bath toys, or paper goods that can touch the tool or holder.
What if there is no floor space beside the toilet?
Use a narrow covered holder if it fits outside the foot path. If it does not, store the dry covered tool in a nearby controlled cabinet and keep chemicals separated.
Sources
- CDC cleaning and disinfecting your home: https://www.cdc.gov/hygiene/cleaning/cleaning-your-home.html
- HealthyChildren childproofing your home: https://www.healthychildren.org/English/safety-prevention/at-home/Pages/Childproofing-Your-Home.aspx