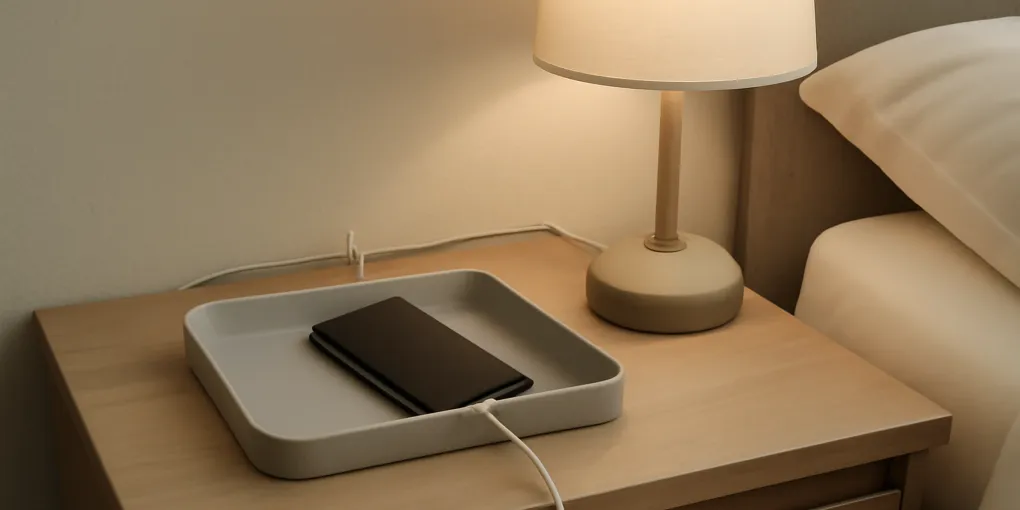
Bedside Charging Tray Protocol: Keep Phones, Cords, and Small Electronics Off the Sleep-Clutter Pile
ProtocolQuick picks
| Product | Key Specs |
|---|---|
| See price on Amazon |
|
| See price on Amazon |
|
| See price on Amazon |
|
Product availability, certifications, and retailer details can change; check the current Amazon page before buying.
A nightstand charging tray works when it gives every nightly device a visible place: phone, watch, earbuds, glasses, and one active cable. It fails when it becomes a soft landing pile for receipts, old adapters, loose batteries, lotion, and the cable that fell behind the bed three weeks ago.
This protocol is for bedrooms where charging clutter steals the whole nightstand surface. If the problem is a closed drawer full of cords, start with our charging drawer reset protocol. If the nightstand is generally overloaded, pair this with why nightstand clutter builds up. The bedside version has one extra requirement: charging should stay visible, cool, and away from bedding.
Product starting points
- Surface landing zone: Search Amazon for shallow valet charging trays when the phone, watch, and earbuds need one nightly address.
- Outlet reset: Search Amazon for Anker compact USB-C chargers when the current setup uses a bulky adapter stack or mystery cube.
- Cable control: Search Amazon for adhesive bedside cable clips when cables slide behind the bed or under the nightstand.
Choose a tray that is shallow enough to scan in one glance. The goal is not a bigger container. It is a smaller, more visible charging routine.
The bedside charging rule
Keep active charging on a hard, open surface, not under blankets, pillows, books, or clothing. ESFI household electrical guidance emphasizes matching cords to safe use and avoiding damaged or overloaded setups. In bedroom terms, that means the charging zone should stay uncovered, should not rely on a chain of extension cords, and should not hide heat, fraying, or a loose plug.
A tray helps because it defines the surface. A phone on the tray is home. A phone under the pillow is not. Earbuds in the tray are findable. Earbuds loose in sheets are a morning search problem. The protocol works only if the tray remains the active-device zone, not the entire bedside junk drawer.
Step 1: Empty the nightstand charging area
Remove everything connected to charging: cables, adapters, power strips, wireless pads, watches, earbuds, old phones, battery banks, and loose batteries. Then remove the non-charging items that keep covering the device: books, tissue packs, receipts, hair ties, coins, pill bottles, and sleep masks.
Sort into four piles:
| Item type | Bedside status | Why |
|---|---|---|
| Phone and nightly wearable | Keep on tray | Used every night and morning |
| Earbuds used for sleep or commuting | Keep if charged nightly | Needs a visible small-object home |
| Travel adapters and spare cables | Move out | They add choice without helping tonight |
| Loose batteries or button cells | Move to protected battery storage | Small-object and child-access risk |
| Old devices | Recycle or store elsewhere | They should not occupy the daily charging zone |
If the item is not used most nights, it does not earn nightstand space.
Step 2: Choose the tray size by device count
For one phone and glasses, a small valet tray is enough. For phone plus watch plus earbuds, choose a tray with two or three shallow zones or add one small insert. Avoid deep fabric bins and lidded boxes. They hide the same small electronics you are trying to make findable.
Measure the nightstand before buying. Leave room for a lamp, water glass, or book without stacking those items on the phone. If a wireless charging pad is used, make sure the phone can sit flat without touching keys, coins, or metal accessories. If a cable is used, the cable should reach the tray without crossing the pillow side of the bed.
Step 3: Reduce to one outlet plan
Most bedside clutter starts at the outlet. A power strip, old USB-A cube, watch puck, lamp plug, and extension cord can turn a simple charging job into a tangled bundle. Decide which devices need nightly power and pick the cleanest path: one compact wall charger with the correct ports, a known-safe power strip placed where it stays ventilated, or a charging pad that does not force the phone into bedding.
Do not keep mystery adapters in the bedroom because they might be useful. Label or relocate extras. Replace visibly damaged cords. If a plug is loose, warm, buzzing, cracked, or repeatedly falls out, treat that as an electrical problem rather than an organizing problem.
Step 4: Clip only the active cables
Cable clips are useful when they hold one or two active leads at the nightstand edge. They become clutter when every spare cord is clipped in a row. Clean the furniture surface first, place the clip where the cable naturally rests, and test from the actual sleeping position. The cable should not pull the phone off the tray when you pick it up.
For adjustable beds, drawers, and beds with storage bases, check movement. A cable that looks neat during setup can pinch when a drawer opens or a bed frame moves. If the cable has to cross a walkway, reroute it or move the charger.
Step 5: Add a weekly tray reset
Once a week, lift every item out of the tray. Wipe dust from the tray, check for loose batteries or coins, and remove anything that is not part of nightly charging. The reset should take less than two minutes. If it takes longer, the tray is too large or the rule is too loose.
Use this question: would I look for this item here at bedtime? If not, move it. The tray should answer one job, not all small-object storage.
Practical score
| Factor | Weight | What matters |
|---|---|---|
| Surface safety | 30% | Devices charge on a hard, open, uncovered surface. |
| Device visibility | 25% | Phone, watch, and earbuds are findable without digging. |
| Cable control | 20% | Active cables stay reachable and undamaged. |
| Outlet simplicity | 15% | The setup avoids adapter stacks and unnecessary extension cords. |
| Reset friction | 10% | The tray can be emptied and wiped quickly each week. |
Bedside charging FAQ
Can I charge my phone under a pillow if it is only overnight?
Do not make covered charging the default. A phone, battery pack, or charger hidden under bedding is harder to inspect and can trap heat. Use a hard, open nightstand surface instead.
Is a wireless charging pad better than a cable?
It can reduce cord handling, but it is not automatically tidier. It still needs a clear surface, the right adapter, and a placement that does not invite coins, keys, or bedding onto the pad.
What if I need multiple devices by the bed?
Use a tray with visible zones and keep the count honest. Phone, watch, earbuds, and glasses may make sense. Spare cables, old phones, power banks, and guest chargers belong outside the bedside routine.
Sources and safety notes
- ESFI extension-cord safety tips for cord condition, extension-cord limits, and safe household use: https://www.esfi.org/extension-cord-safety-tips/
- ESFI home electrical safety guidance for overloaded circuits, damaged cords, and safe home electrical habits: https://www.esfi.org/home-electrical-safety/
- HealthyChildren.org childproofing guidance for button batteries, small objects, and child-access hazards: https://www.healthychildren.org/English/safety-prevention/at-home/Pages/Childproofing-Your-Home.aspx
Frequently Asked Questions
- A hard, open nightstand surface is a better charging location than bedding because it keeps the device visible, ventilated, and away from blankets.
- Keep only the cables used nightly. Store guest, travel, and obsolete cables outside the bedside zone.
- No. Spare batteries, especially button cells, should stay in original packaging or a dedicated battery organizer away from children.