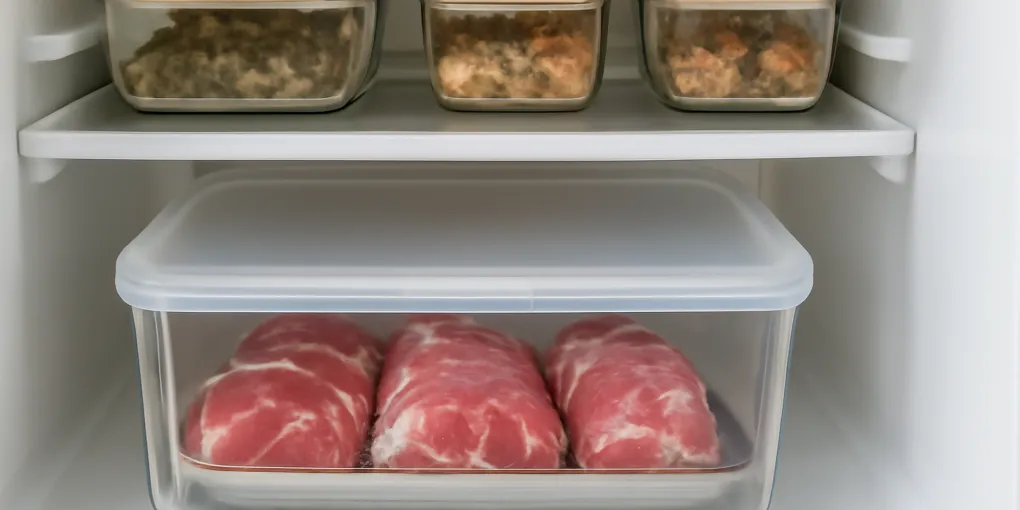
Raw Meat Thawing Bin Protocol: A Fridge Zone That Prevents Leaks, Guesswork, and Dinner-Time Digging
ProtocolQuick picks
| Product | Key Specs |
|---|---|
| See price on Amazon |
|
| See price on Amazon |
|
| See price on Amazon |
|
Product availability, certifications, and retailer details can change; check the current Amazon page before buying.
A refrigerator feels organized until a frozen package starts thawing behind the yogurt. Raw meat and poultry need a different system than condiments, lunch snacks, and produce because the failure mode is not just visual clutter. The problem is leakage, unclear timing, and raw packages touching food that will not be cooked again.
This protocol creates one low, washable thawing zone. It is not a meal-prep overhaul. It is a small containment system for the moment when something moves from the freezer to the refrigerator and everyone needs to know where it belongs. For nearby kitchen resets, see our fridge leftover bin reset protocol and freezer inventory bin system explained.
Product starting point
- Main bin: Search Amazon for clear lidded refrigerator bins
- Low tray: Search Amazon for rimmed refrigerator trays
- Timing cue: Search Amazon for freezer tape date labels
Pick the container by shelf height, not by how tidy it looks online. A lidded bin is useful when it slides out cleanly and can be washed. A tray is better for tall packages or a crowded refrigerator, but the lip needs to be high enough to catch liquid from a damaged wrapper.
Step 1: Assign the lowest safe shelf
Utah State University Extension’s thawing guidance recommends refrigerator, cold-water, or microwave thawing and explains why room-temperature thawing is not a safe shortcut. The organizing detail that matters is placement. Raw packages should not sit above berries, salad greens, leftovers, lunch meat, or uncovered prepared food.
Use the lowest practical shelf or a lower drawer zone. If your refrigerator has a deli drawer above produce, do not make that drawer the raw-meat thawing area unless the package is inside a secondary tray that cannot leak downward. The bin should be visible enough that no one shoves a lunch container underneath it.
A good placement rule is simple: raw food below ready-to-eat food, never the other way around.
Step 2: Make the zone physically different
A thawing zone fails when it looks like every other clear fridge bin. Give it one unmistakable difference:
- A lidded bin reserved only for raw thawing packages.
- A white or stainless rimmed tray that lives on the bottom shelf.
- A silicone mat under the tray if the shelf surface is hard to clean.
- A small removable date clip or piece of freezer tape on the outside.
Do not store produce bags, snack packs, cheese, or leftovers in this container when it is empty. Empty space is useful because it keeps the job obvious. If the household starts using the thawing bin as overflow storage, the raw package will end up wherever there is room.
Step 3: Date the move, not the package story
The most useful label is not a full inventory record. It is the day the package moved from freezer to refrigerator. Write “moved Sun” or use a day-of-week clip. That cue helps the cook decide whether dinner needs to happen tonight or whether the package should be handled according to food-safety guidance.
The FDA refrigerator and freezer storage chart gives general storage windows for many foods. It is a reference, not a reason to keep mystery packages. If a wrapper is torn, unlabeled, leaking badly, or older than anyone can identify, the organizing answer is not a prettier bin. The answer is to discard it safely and reset the zone.
Step 4: Wash after raw-food contact
The thawing bin needs to be easy to clean because it will eventually catch liquid. Choose dishwasher-safe materials when possible. If hand washing is required, keep the shape simple: no woven baskets, fabric liners, cardboard dividers, or complicated snap-in corners.
After a raw package leaves the bin, check the container before returning it to the refrigerator. Wash it if there is moisture, residue, or odor. Dry it before reuse so the refrigerator shelf does not become a damp storage area.
Product fit matrix
| Option | Best use | What to avoid |
|---|---|---|
| Lidded clear bin | Everyday raw meat and poultry packages | Too-tall lids that scrape the shelf above |
| Rimmed tray | Whole birds, roasts, or low shelf clearance | Flat trays with almost no leak lip |
| Date tape | Households that forget thaw timing | Labels that stay on through washing and become grime |
| Silicone mat | Extra protection under a tray | Using a mat as a substitute for washing leaks |
How to evaluate the setup
| Factor | Weight | What matters |
|---|---|---|
| Leak control | 35% | Raw packages stay contained even if a wrapper fails. |
| Food separation | 25% | Ready-to-eat food is stored above or away from raw thawing packages. |
| Usability | 20% | The cook can see what is thawing without moving half the fridge. |
| Cleanability | 10% | The tray or bin can be washed quickly. |
| Timing clarity | 10% | The move date is easy to see and remove. |
FAQ
Can I thaw raw meat on the counter if it is still frozen?
No. Use refrigerator thawing, cold-water thawing, or microwave thawing according to food-safety guidance. A counter may feel convenient, but it does not solve the temperature-control problem.
Should I use a separate bin for seafood?
If your household thaws seafood often, a separate small tray can help with odor and timing. The same rule applies: low shelf, washable surface, and no ready-to-eat foods in the raw zone.
What if my fridge is too small for another bin?
Use a rimmed plate or tray on the lowest shelf and store fewer thawing packages at once. The protocol is about containment and separation, not buying the biggest organizer.
Sources
- Utah State University Extension, safely thawing foods: https://extension.usu.edu/preserve-the-harvest/research/safely-thawing-foods
- FDA refrigerator and freezer storage chart: https://www.fda.gov/media/74435/download